When it comes to whitetail hunting, the most critical point is making the shot.
It doesn’t just mean landing the broadhead or bullet where you were aiming for, but the prior decision about which part of the deer you wish to hit is just as important as the shot itself.
Understanding deer anatomy and various shooting scenarios will help you know where on a deer you should shoot; to improve your odds of making a clean, quick, and ethical kill.
In this deer shot placement chart, we will look at:
Stay tune...
Shooting Angles
Best Shot Placement For Whitetail Deer
The aiming angle is more often dependent on the direction the deer is turning, facing, or walking, as opposed to the position you as the hunter put yourself in.
When it comes to getting the ideal angle and shooting opportunity, it usually takes patience, waiting for the clear shot to present itself.
Broadside (Best)
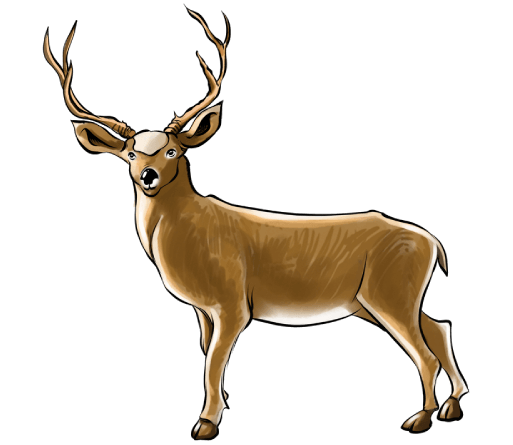
When the deer is standing perfectly side-on, this is known as “broadside.”
This is the best and most reliable shooting angle as it creates the largest surface area for access to vital organs, primarily the lungs.
A shot at this angle has a good chance of passing through both lungs, ensuring a quick, effective kill.
Quartering Away (Good)
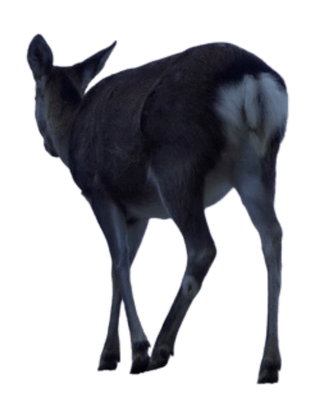
A quartering away position is when the deer has slightly turned away from you, with much of its side still showing.
From full broadside up to a maximum of 45 degrees turned away is a reasonable shot as you still can hit the vital organs.
Still, it is better than a “quartering towards” shot because access to the vitals is less likely to be impeded by the shoulder.
Quartering Towards (OK)
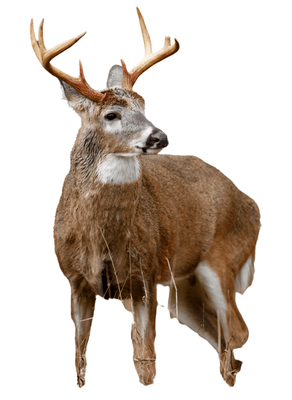
This shot angle still gives a reasonable opportunity to hit vital organs, but it is the potential for the collateral damage that becomes the main issue with a quartering-towards shot.
The deer’s shoulder is usually in the way of the shot, meaning that you risk either poor penetration with an arrow or shattered bone fragments with a bullet.
There is also a greater risk of a pass-through to the stomach if not perfectly executed.
Front-On (Not Great)
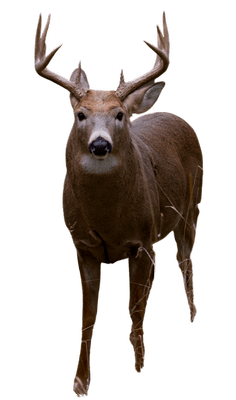
When a deer is facing your front on, you generally still have a clear look at the vitals as long as the head is up.
However, the vital hit zone from this angle is usually only about a hand size, which makes for a riskier shot.
If you were to attempt this shot, it is preferred to make the shot with a slight downwards trajectory to reduce the risk of a pass-through to the stomach and other “messier” organs.
Rear (Never)
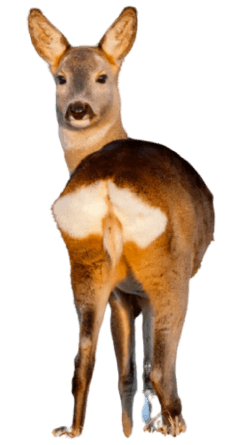
When a deer has completely turned away from you, there is no real reasonable shot to be made.
The deer bulk protects, the primary organs of the heart and lungs.
There may be a rare exception opportunity for the experienced rifle shooter to shoot for the neck or head (if raised), which we will address later in this article.
Where To Shoot A Deer Diagram (Deer Vitals)
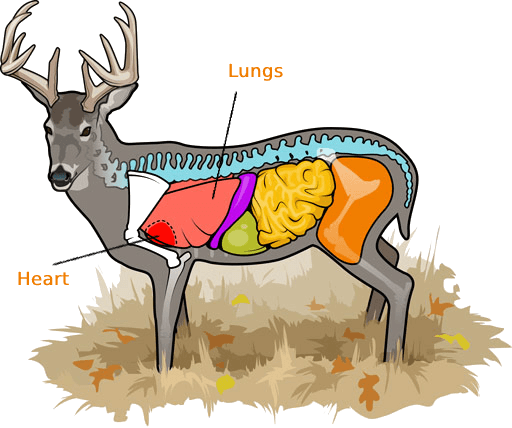
Two vital organs should be the first choice targets: the heart and lungs. These targets are the best options regardless of whether you have a traditional bow, crossbow, or firearm in hand.
These offer the most reliable death for whitetail and should require a generally accurate shot, rather than one of elite precision.
Heart
Via realtree.com
The heart is the holy grail of deer hunting shot placement. Hitting the heart means a near-instant death to the animal.
It also leaves a strong blood trail if the deer manages to crash through some brush or tumble down a hill.
Even though the heart itself is a small target, the fact that it is nestled alongside the lungs means that a slightly inaccurate heart shot attempt is likely to still pass through vital organs.
Lungs
To most hunters, the lungs are the safest and best chance at a clean ethical kill. They offer the largest vital surface area to hit.
The chances of a shot passing through both lungs depend upon the angle of the deer. Broadside shots are almost guaranteed to pierce both lungs, ensuring a quick death.
On the occasion that only one lung is hit there is still a high likelihood that the animal will die within a reasonably short time.
Additional Deer Shot Placement (Rifle Only)
A couple of different shot placements become available to rifle hunters, which would be generally unethical for a bowhunter.
These can only really work effectively with a firearm because rifles offer greater impact energy and are more consistent with precision shooting.
Head

A headshot is often misunderstood as a good aiming point for hunting; however, this is not the case.
A perfect headshot will mean an instant death with zero meat waste, but unfortunately, this shot leaves little-to-no margin for error.
The head of a deer is reasonably small and the brain zone even smaller.
An inaccurate headshot can lead to a horrible outcome for the deer, often leading to a slow and painful death over days or weeks; due to a broken jaw, damaged eyesight, or hearing.
Neck (Main)
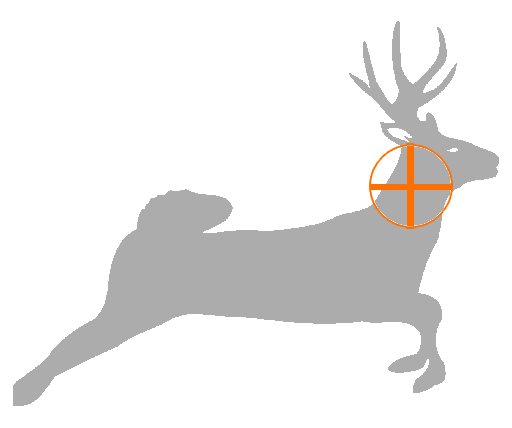
The neck is a shot that divides hunters. Some swear by it as a solid option, while others refuse even to consider it.
Although a better proposition for the surface area than a headshot, there is still a low margin for error.
A well-placed shot that hits vertebrae or spinal cord will likely drop the animal on the spot.
The key issue with this shot is that if you miss slightly and instead hit the muscle or throat of the deer, you could end up with a living deer that is unable to lift its head or eat or drink properly.
As with all shots, the ability to execute ethically is critical.
Neck (Top)
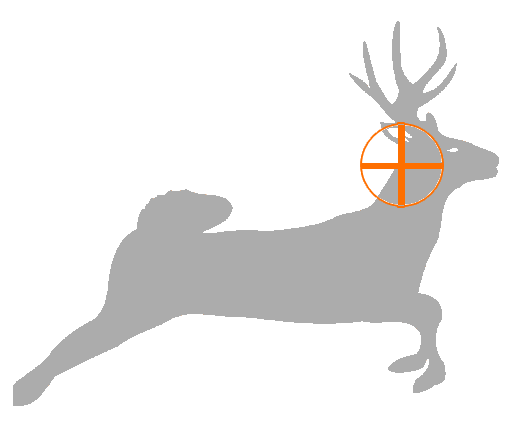
A shot to the top of the neck, near to where it joins the skull, is one of the quickest and harvest-friendly if hit perfectly.
In real-time hunting scenarios, this shot offers a very low margin for error.
If you have a downed animal that needs a follow-up shot to finish the job, this shot type can be a good choice.
As minimal meat gets spoiled in the process and is also unlikely to cause much damage to the antlers or skull.
Results of Placement (or Misplacement)
Mistakes happen in the field. A misplaced shot is not a matter of “if” but “when” for any regular hunter.
As hunters, we do everything we can to make sure we get a clean vital hit, but... what happens if we do get it wrong? Let's take a look at the scenarios:
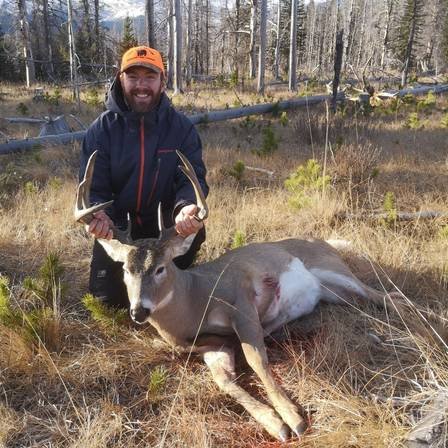
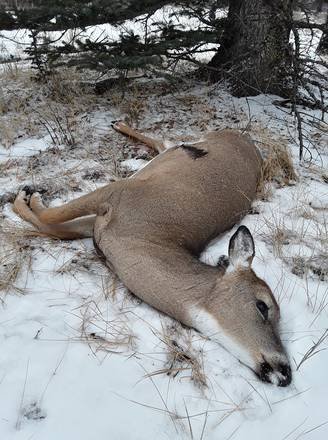
Vital Hit
The vitals of an animal is a clean shot on the organs and areas mentioned above. In the majority of these situations, the deer will die anywhere from instantly to within the hour.
Unless you see the animal drop and know for sure that it has already died, it is recommended to wait at least half an hour to give the animal time to lay down and pass away peacefully.
Stomach
Hitting the stomach or intestines generally still results in the animal’s death, albeit a much slower one.
It is important if you believe you’ve hit the stomach area to give the animal time (at least 8 hours) to lay down to die or you risk bumping and losing the deer.
Flesh/Muscle
On most occasions, a shot through the muscle is not fatal, leaving the animal wounded.
The onus would be on the hunter to continue to hunt for the animal to try to follow up and re-find the animal and finish the job.
Unfortunately, wounded bucks can be tough to relocate as they actively try to vacate the scene and get away from the threat.
Clean Miss
Apart from an effective vital hit, this is probably the following best result.
To miss the vital organs and miss the animal entirely means there is no wounded or injured deer to track.
It also means you have the opportunity to regather your thoughts and continue your hunt.
Pro Tips for Improving Shot Placement
Improving your shooting and shot placement proficiency is dependent on time and quality of practice.
Whether a rifle or bow hunter, it is beneficial to replicate real-life hunting scenarios in training.
This may mean taking shots in undulating terrain, placing shots between brush,es or getting your heart rate or fatigue elevated pre-shot.
Practice with Bows or Crossbow
For additional bowhunting practice, you can choose a random distance between 10-40 yards for your effective crossbow or bow and release your arrow.
Rather than only practicing with repeated shots at a standard 30 yards, emulating a changing distance with a single shot opportunity will help to simulate in-the-field pressure.
Using a 3D deer target is also a good idea as you have the ability to visualize real hunting scenarios.
You can even shoot from your favorite treestand and see exactly where it would be placed if shot on an actual hunt.
Practice with Rifle
When practicing your rifle shooting, one of the best exercises you can do is to train using different natural (or gear) shooting rests.
Stability and comfort is important for those longer rifle shots.
Familiarizing yourself with shooting from different positions, against different items, will really help you to feel more confident when it comes to the crunch.
Final Thoughts
Hunting scenarios are constantly changing, and chances need to be taken when they are offered.
Making a clean shot depends upon understanding deer anatomy and realistic deer kill shot placement.
Hunter shooting proficiency and accuracy play a large part in which shot types, or organ targets are viable.
Whenever you have the opportunity, you should be trying to improve the odds of a swift death for the deer.
The game’s name is to fill the freezer, and the best chance of that happening is by making as ethical and effective a shot as possible.
Feel free to share your stories and thoughts on deer shot placement chart in the comments below!
Related Posts:
